
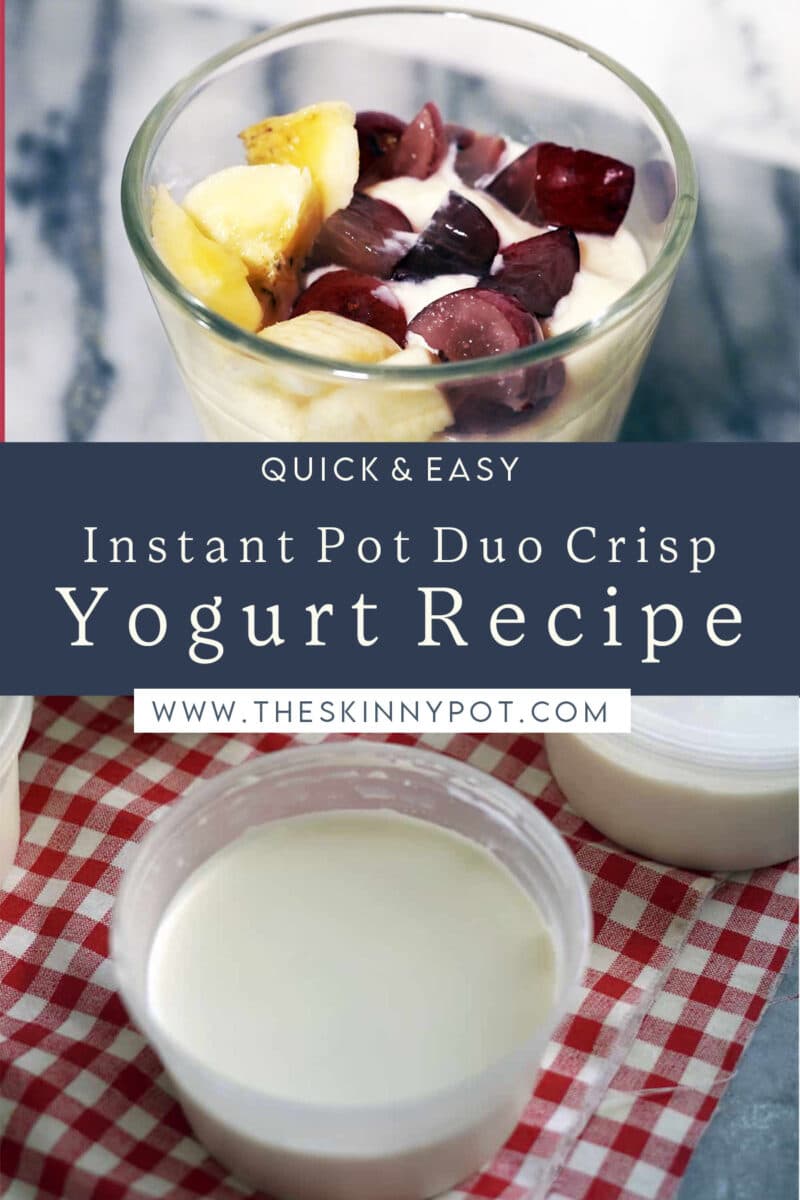
Instant Pot Duo Crisp Yogurt Recipe. This easy guide teaches how to make creamy, homemade yogurt in the Instant Pot Duo Crisp. It includes tips on boiling milk, the sous vide method, consistency fixes, and more!
For more recipes: Homemade Yogurt Recipe using the Yogurt Function.
Instant Pot Duo Crisp Yogurt Recipe: A Comprehensive Guide
Yogurt-making at home has become a popular and rewarding endeavor, and using the Instant Pot Duo Crisp offers a convenient way to achieve creamy, delicious results. However, many home cooks have questions about the process. In this guide, we’ll address common queries to help you make perfect yogurt with confidence.
Can You Make Yogurt in the Instant Pot Duo Crisp?
One of the most frequent concerns is that the Instant Pot Duo Crisp does not have a dedicated yogurt button. While some Instant Pot models include this feature, you can still make yogurt using the sous vide function or manually controlling the temperature.
Do You Need to Boil the Milk First in this Instant Post Duo Crisp Yogurt Recipe?
When making homemade yogurt, many traditional recipes heat the milk to 180°F before cooling it to around 110-115°F to add the starter culture. This step is essential if you use regular (non-ultra-pasteurized) milk, as it helps denature the proteins, resulting in a thicker consistency. However, if your milk is ultra-pasteurized, this step is often unnecessary. You can still heat the milk for extra assurance, but it is not a strict requirement.
Adjusting the Recipe: Can It Be Halved?
Yes, you can halve this recipe without any issues. The fermentation time remains the same, regardless of the quantity of milk used. The most critical factor is maintaining the correct incubation temperature, which allows the yogurt culture to develop correctly.
Consistency Concerns: Why Is My Yogurt Runny when Using this Instant Pot Duo Crisp Yogurt Recipe
Homemade yogurt often has a different texture compared to store-bought varieties. Several factors affect the consistency, including the type of milk, the quality of the starter, and the incubation duration. If your yogurt remains runny after the fermentation period, consider these troubleshooting tips:
- Ensure your starter culture is fresh and active.
- Maintain the correct incubation temperature throughout the process.
- Allow the yogurt to fully set in the refrigerator before assessing its final texture.
- Lastly, this tip is what I often use: If the yogurt is still runny after six hours, let it ferment for two to three more hours.

Using the Sous Vide Method: Do You Need Jars?
The sous vide method of making yogurt typically involves submerging jars in a water bath to maintain a consistent temperature. However, this recipe we have here skip the method, and we did not submerge the jars with water but instead, allow incubation directly in the Instant Pot without jars.
If however, you want to use jars, simply transfer the milk mixture to the jar and line and stack them in the inner pot, set the sous vide setting, set the timer to 8 hours. Sometimes, the top jar are not set after this duration, so remove the set ones and continue fermenting the unset ones.
Should You Remove the Silicone Ring?
Many users recommend removing the silicone sealing ring from the Instant Pot when making yogurt to prevent flavor transfer from previously cooked foods. If your ring has absorbed strong odors, such as from soups or stews, you may want to remove it or dedicate a separate ring solely for yogurt-making.
Let’s make yogurt at home now!
Making yogurt in the Instant Pot Duo Crisp is straightforward once you understand the key principles. Whether you choose to boil the milk first, use jars for sous vide, or adjust batch sizes, following these guidelines will help you create delicious homemade yogurt with confidence. Happy fermenting!
Instant Pot Duo Crisp Yogurt Recipe using the Leftover Yogurt I had
Equipment
- 1 Instant Pot Duo Crisp or Instant Pot with Yogurt Function 8 quart
- 6 Small Containers
Ingredients
- 6 oz Vanilla flavor Yogurt Starter or you can use the leftover yogurt you made, so keep about 1/2 cup of the yogurt you made and use it to make yogurt.
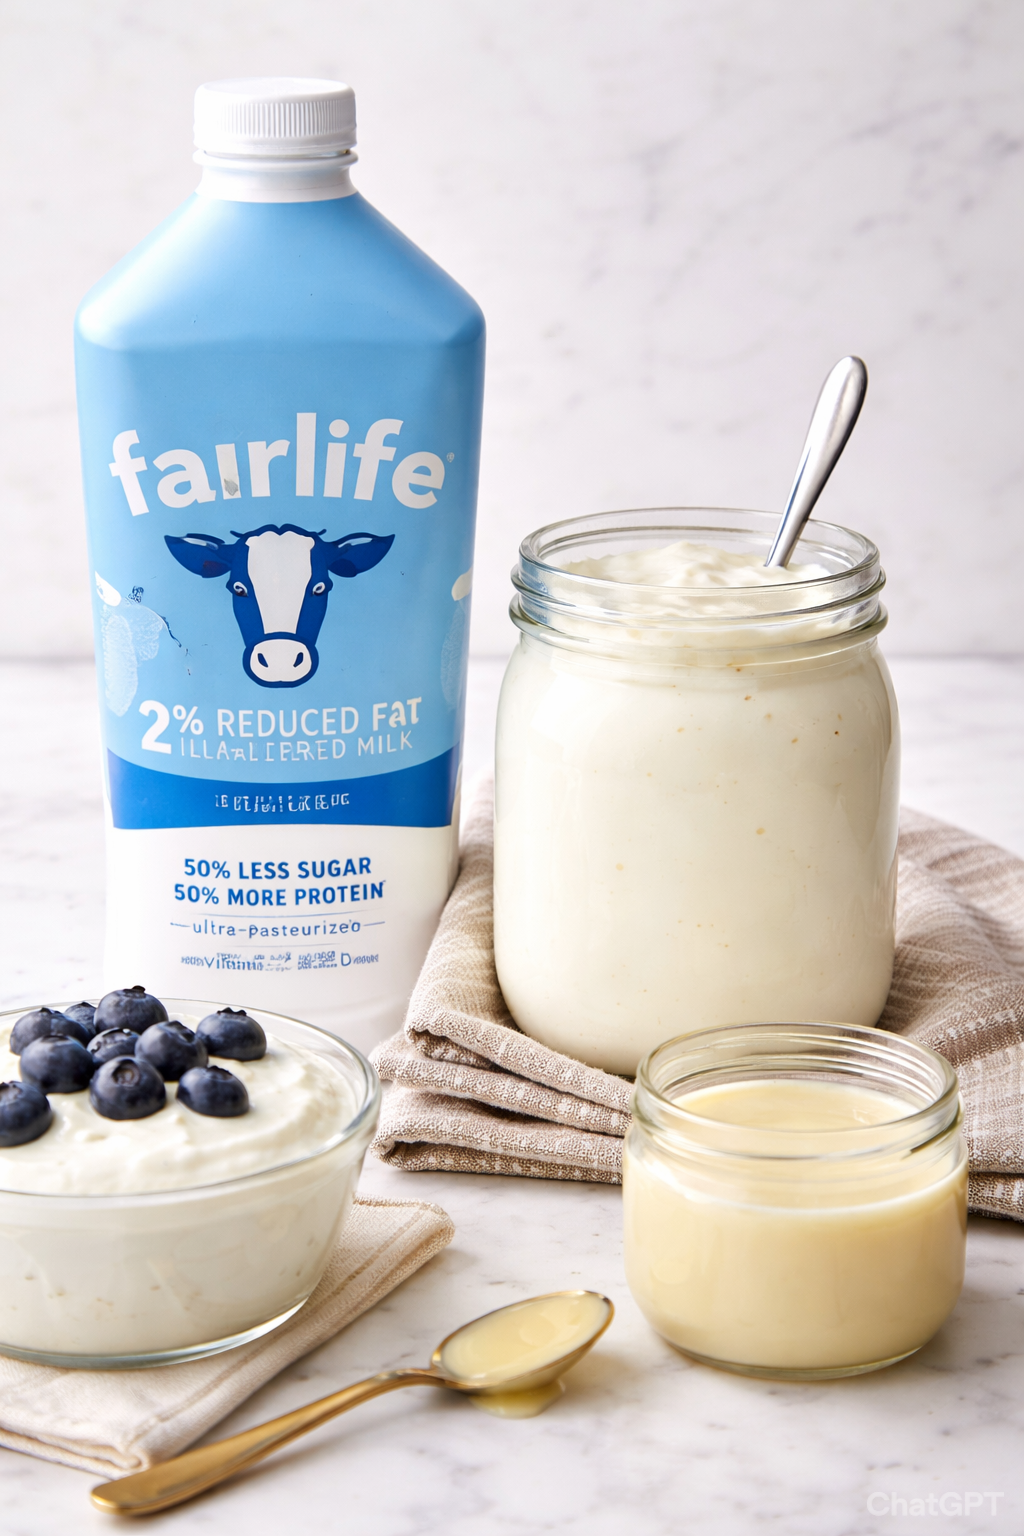
- 4 cups Fairlife Milk
- 1/2 cup Sweetened Condensed Milk
Instructions
- In this Instant Pot Duo Crisp Yogurt recipe, we use 1 tub of vanilla flavor yogurt as starter. Add the milk in the container and add the yogurt and the condense milk. Mix vigorously to ensure that the ingredients are well combined. Transfer the mixture to the inner pot.
- Cover with the pressure cooker lid and push the sous vide setting. Set the timer to 113 F and set the timer to 8 hours for firmer yogurt. Set the time to six hours for more liquidy yogurt. Don’t go down incubation times below 6 hours.
- If the yogurt has not set after eight hours, add 5 to 6 hours more.
- Place the inner pot in the fridge to store for 4 hours and transfer the yogurt in your favorite container. This yogurt is good for one week.
IF YOU HAVE INSTANT POT WITH YOGURT FUNCTION EQUIPMENT
- Instant Pot WITH Yogurt function setting: Add the milk in the container, add the yogurt and the condense milk. Mix vigorously to ensure that the ingredients are well combined. Transfer the mixture to the inner pot or in a small container.
- Cover with the pressure cooker lid and push yogurt setting. Set to Normal. Set the timer to 8 hours for firmer yogurt. Set the time to six hours for more liquid yogurt. Don’t go down incubation times below 6 hours.
- If the yogurt has not set after eight hours, add 5 to 6 hours more.
- Sweeten your yogurt with honey before serving if you like.

Welcome!
Hi, my name is Shobee. Welcome to The Skinny Pot, where we cook Easy Recipes from the available ingredients from our pantry and fridge! We’re your go-to source for simple and delicious recipes that make the most of what you already have at home. Talk about the pantry challenge. Read more...


Leave a Reply