
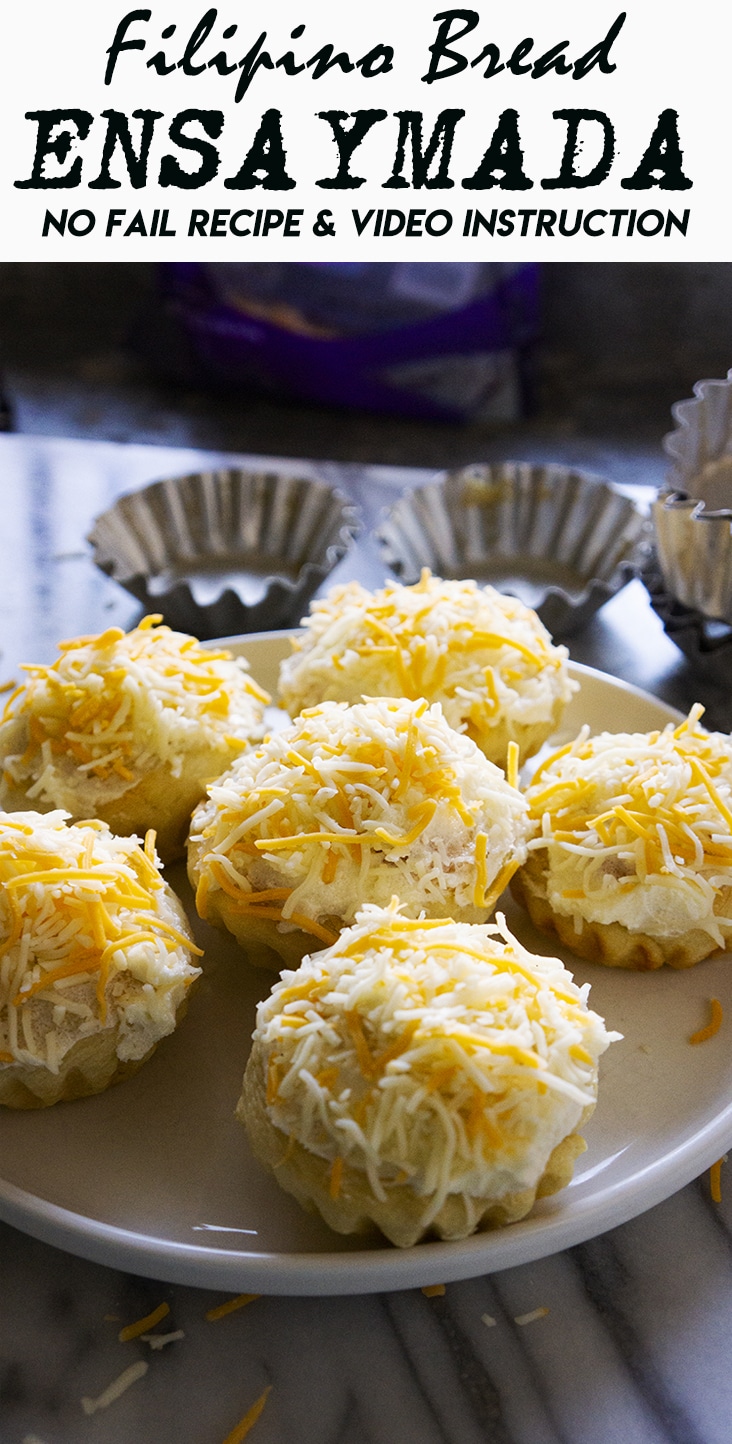
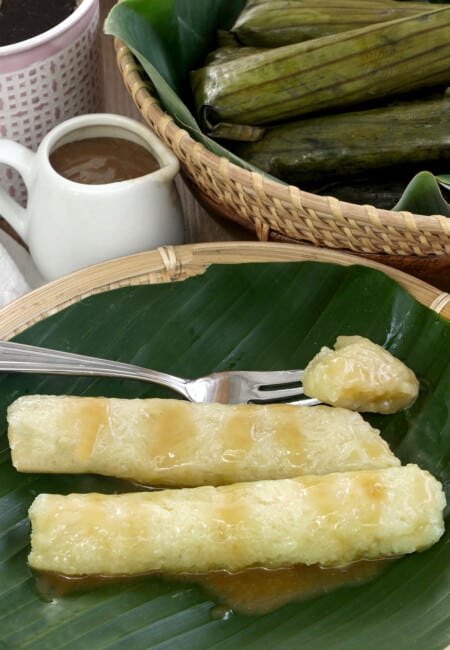
This Ensaymada recipe produces soft and fluffy bread and includes a step-by-step video. If you’ve attempted other Ensaymada recipes without success and are considering giving up, don’t lose hope! This delightful, sweet, and savory treat is now easy to make, thanks to this quick and reliable no-fail Ensaymada recipe.
Why make this Ensaymada
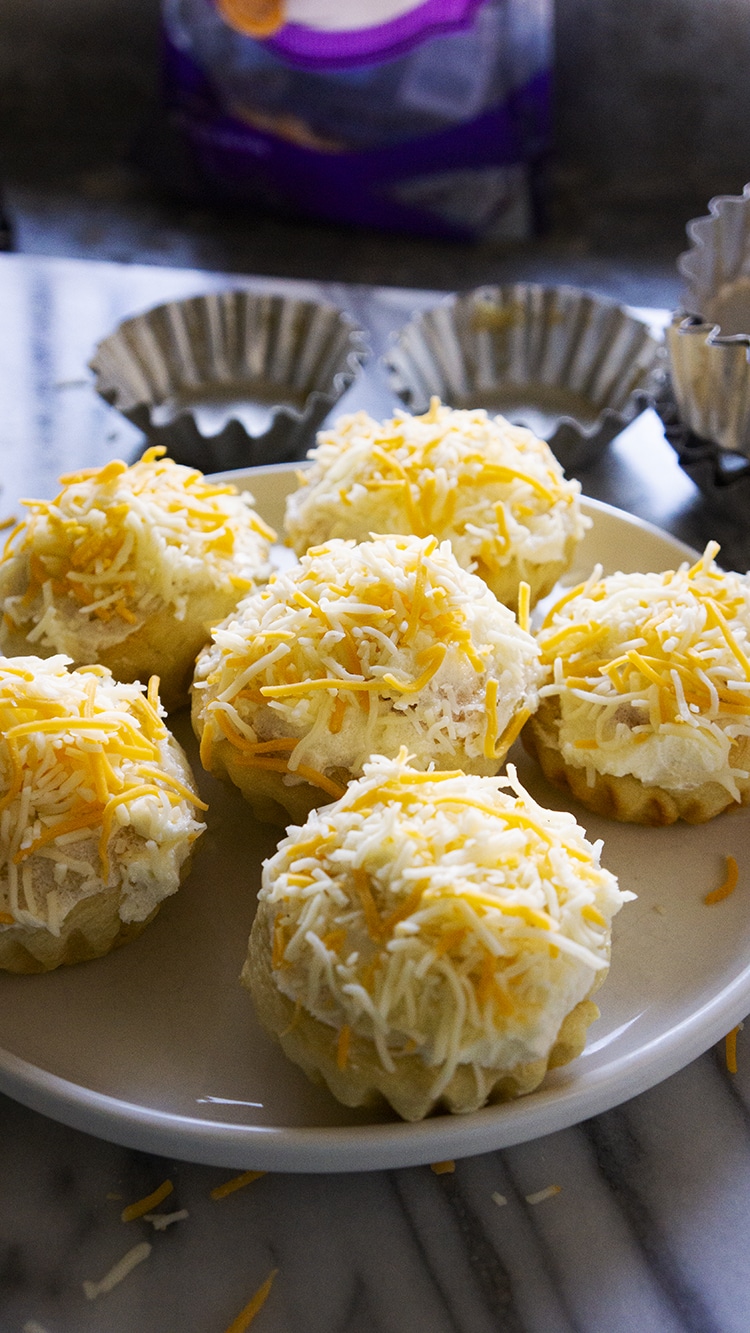
This Ensaymada recipe is easy to follow and captures the delightful taste of those from Red Ribbon or Goldilocks. It yields 12 pieces of fluffy bread, making it perfect for any Filipino party or special occasion. Feel free to double the recipe if you want to make more and share it with everyone. This is your opportunity to create your own Ensaymada instead of buying it from Goldilocks or Red Ribbon.
Is Ensaymada Spanish or Filipino?
Ensaymada originated as a traditional spiral-shaped pastry topped with sugar in Mallorca, Spain. This delightful dessert became a famous Filipino bread after Spain colonized the Philippines for 300 years. The finished product is topped with butter and sugar, with cheese added to balance the sweetness. Most Filipinos enjoy it as a perfect breakfast choice paired with coffee.
Equipment Needed To Make Ensaymada
- Oven and Stove Top Burner: You will need a burner and pot to prepare the water roux and an oven to bake the Ensaymada.
- Cupcake Mold: A cupcake mold perfectly shapes these rounded treats.
- Electric Mixer: Either a hand or stand mixer makes it much easier to mix the dough. You can mix by hand, but it will require more effort!
- Mixing Bowls and Utensils: A few bowls and tools will help you measure and combine the ingredients for this recipe.
What is Ensaymada Made Of?
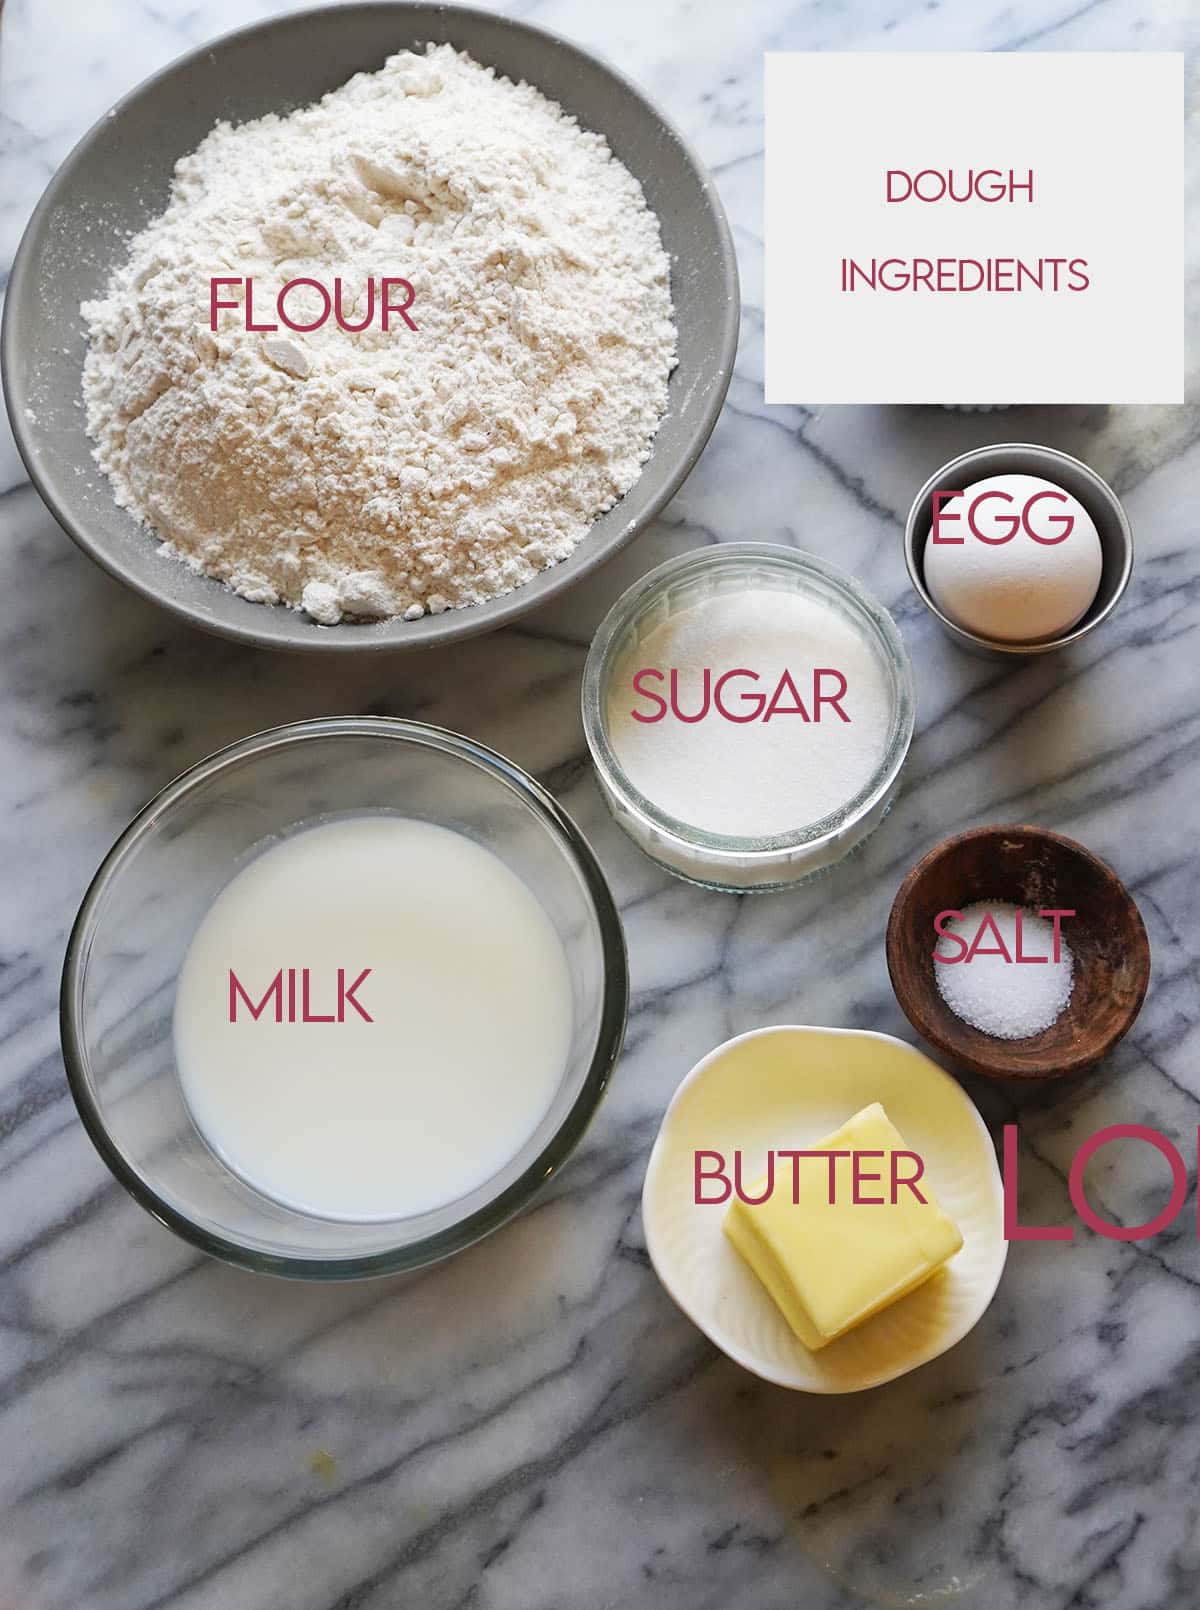
For the Dough
- All-Purpose Flour: This flour has the right protein content for Ensaymada. Avoid substituting it, as doing so may affect the final texture.
- Sugar: White granulated sugar imparts a lightly sweet flavor.
- Salt: A hint of salt enhances the overall taste. Use your favorite fine-grain salt.
Active Dry Yeast: This ingredient helps the dough rise and adds a pleasant, yeasty flavor. You can substitute it with instant yeast in a 1:1 ratio, but do not dissolve the instant yeast—mix it directly into the flour. - Milk: Use a high-fat variety, like whole milk, to add a rich, creamy flavor and texture.
- Egg: Eggs act as a binder, leavening agent, and flavor enhancer. Always opt for the freshest eggs available.
- Butter: Unsalted European butter, if available, enhances the rich flavor of the recipe.
For the Water Roux:
- All-Purpose Flour and Water: This simple water roux stabilizes the bread and improves its texture. Use all-purpose flour and filtered tap water.
Yeast Mixture:
- Water and Active Dry Yeast
For the Topping:
- Butter: The unforgettable buttery, cheesy topping requires softened butter for easier spreading.
- Sugar: White granulated sugar adds sweetness to the topping.
- Sharp Cheddar or Mixed Mexican Cheese: Sharp white cheddar provides the perfect flavor and color, but you can substitute it with another sharp cheese, like mixed Mexican cheese. Whether freshly grated or pre-packaged, shredded cheese works wonderfully for this recipe.
How to Make Ensaymada
Making Ensaymada is an easy process, and it is unnecessary to be intimidated by it. With the step-by-step video attached here and the clear-cut recipe below, there is no doubt that your first try will succeed.
- Make a roux by mixing flour and water in a small saucepan over low heat until pasty. Let cool and set aside until needed.

- Warm 1/2 cup milk and add the yeast. Set aside for 5- 10 minutes until bubbles form.

- Mix flour, sugar, and salt in a large bowl and make a well in the middle. Add the proofed yeast and mix using a wooden spoon or spatula. You can also coat it with a small amount of oil with your hand.

-
Add the egg and mix until the dough is incorporated, then add the water roux and try to mix until the dough is combined.

Add the butter intermittently. Add a small amount of the butter, then mix the rest until you form a smooth, workable dough. Transfer the dough to an oiled bowl, cover it with a cloth or plastic wrap, and let it rise warmly for an hour until it doubles.

-
Transfer the dough to an oiled bowl, cover it with a cloth or plastic wrap, and let it rise warmly for an hour until it doubles.

-
When ready, punch the dough twice and work on a floured surface.

- Form a circle and divide it into 16 pieces (depending on the size of Ensaymada you want).

-
Form each piece into a log.

- And coil dough from one end to another.

- Transfer the coiled dough and put it into a prepared pan. Let rise for another 30 minutes.

-
Bake in a pre-heated 350 F oven for 15-20 minutes.
Tips for Success
- Use Non-Expired Yeast: Check the expiration date on the packet. If your yeast doesn’t bloom or form bubbles within 10-15 minutes, it is expired and should be discarded.
- Gather All Ingredients and Utensils: Having everything ready will make the process less stressful.
- Flour Your Working Surface: This will prevent the dough from sticking.
- Follow the Water Roux Steps: Skipping this step can lead to hard bread, which is essential for a successful Ensaymada.
- Read the Recipe Thoroughly: Go through the recipe multiple times to familiarize yourself with the steps.
How Do You Eat Ensaymada?
Ensaymada is commonly served with coffee or tea; many enjoy dipping it in milk.
Where Can I Find Ensaymada Molds?
I purchased my molds at a pastry store in the Philippines, but I’ve also seen them at Bed Bath & Beyond.
Is Ensaymada a Brioche?
Yes, Ensaymada is indeed a type of brioche. While the bread’s texture and taste are delightful, adding butter frosting, sugar, and cheese makes it unique.

FOR MORE EASY & QUICK FILIPINO BREAD RECIPES:
Follow me on Instagram, Pinterest, and Facebook
Soft and Fluffy Ensaymada Recipe
Equipment
- Oven
- Cupcake Mold in Metal
- electric mixer
- Stove top for Water Roux
- Ladle for mixing
- Mixing bowls
Ingredients
Yeast Mixture
- 2 teaspoons Active Dry yeast
- 1/2 cup warm milk or water
WATER ROUX:
- 1/4 cup All Purpose Flour
- 1/2 cup water
Dough Mixture
- Yeast Mixture
- Water Roux
- 2 1/4 cups All Purpose flour
- 1/4 cup sugar
- 1 teaspoon salt
- 1 large egg
- 1/4 cup butter softened at room temperature
FOR THE TOPPINGS:
- 1/2 cup unsalted butter softened for easy spreading
- 1/2 cup sugar
- 1 cup sharp cheddar or mixed Mexican cheese
Instructions
MAKING DOUGH:
- Brush pan and bowl with melted butter and set aside.
- Make a roux by mixing flour and water in a small saucepan. Turn on the heat in low fire and mix until pasty. Let cool and set aside until use.
- Warm 1/2 cup milk or water in the microwave. for thirty seconds. Add the yeast, mix, and set aside for 5- 10 minutes until bubbles form.
- Mix flour, sugar, and salt in a large bowl and make a well in the middle. Add the proofed yeast and mix using a wooden spoon or spatula. You can use your hand too if you want, just coat it with a small amount of oil.
- Add the egg and mix until the dough is incorporated, then add the water roux and try to mix until the dough is combined.
- Add the butter intermittently. Add a small amount of the butter, then mix, Add butter then mix, and add the rest of the butter until you can form a smooth workable dough. Transfer the dough to an oiled bowl and cover it with a cloth or plastic wrap, and let rise in a warm place for an hour until it doubles its size.
- When ready, punch the dough twice and work on a floured surface. Form a circle and divide it into 16 pieces (depending on the size of Ensaymada you want).
- Form each piece into a log and coil dough from one end to another. Transfer the coiled dough and put it into a prepared pan. Let rise for another 30 minutes.
- Bake in a pre-heated 350 F oven for 15-20 minutes.
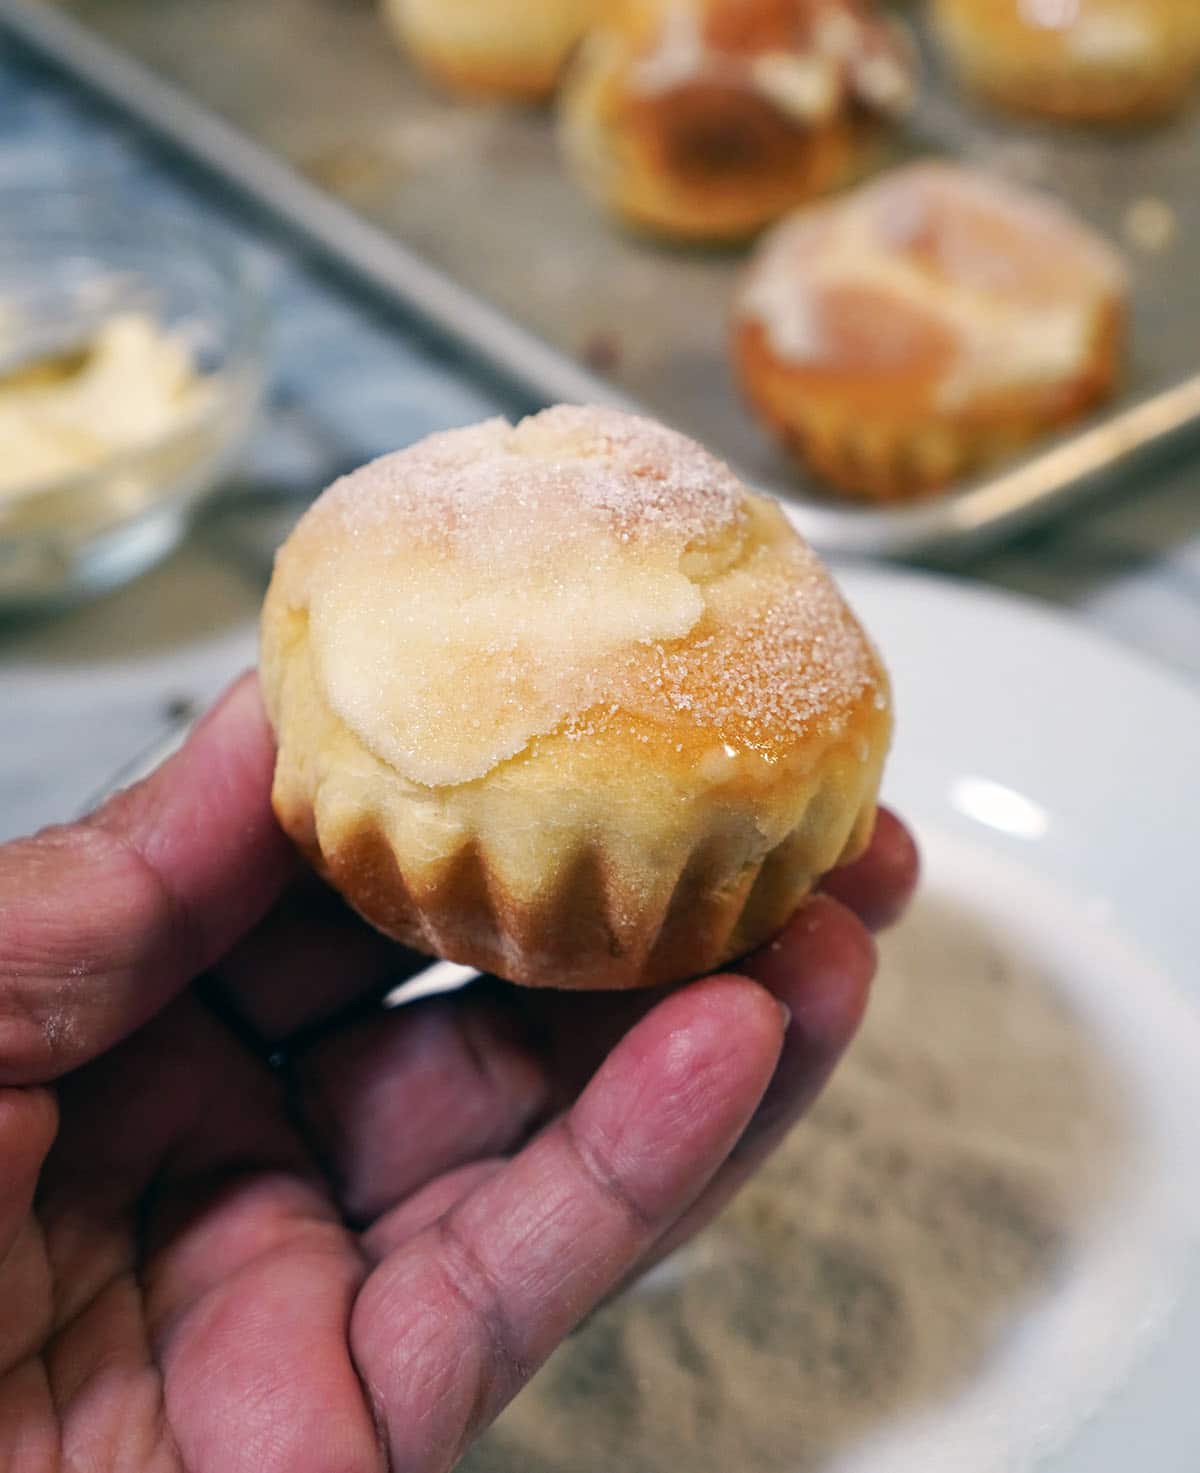
- Let cool and frost.
FOR THE FROSTING:
- Soften the butter and spread it on top of the bread. Sprinkle with cheese first and sugar. Or, mix the butter and sugar first and frost into the Ensaymada and add the cheese.
Video

Notes

Welcome!
Hi, my name is Shobee. Welcome to The Skinny Pot, where we cook Easy Recipes from the available ingredients from our pantry and fridge! We’re your go-to source for simple and delicious recipes that make the most of what you already have at home. Talk about the pantry challenge. Read more...


Shobelyn Dayrit says
The Ube Ensaymada is the same recipe cut in half, so it should not be that Pancake batter wet. It will be wet as I mentioned, but add a small amount of flour to make it workable. So sorry! I wish you had the picture so that I can troubleshoot.
Maria says
Hi this is my go to for enseymada recipe
But the new Ube enseymada dough is like pancake in consistency after following the exact measurements of your flour. 1 1/8 cup . It’s very wet I wonder if 1 1/8 cup is the right flour we need to make this recipe ? Many thanks
Shobelyn Dayrit says
Yes.
Abby says
How do i double qty? Do i jist double the recipe even the yeast?
Shobelyn Dayrit says
I am not sure what size they are, but almost similar to the muffin mold.
Natalie says
Yeah, been looking around too. 🙂 What’s the size/diameter of your tin molder?
Really appreciate this.
Shobelyn Dayrit says
Hi! Kraft is good, but I have yet to find something that’s close to Eden 🙁
Natalie says
Hi,
Tried this twice already and my kids empty the pans almost immediately soon as these get out of the oven and frosting added.
Just want to check though what type of cheese is closer to the taste of our EDEN cheese from Phils.? My kids love Eden cheese and would a prefer similar tasting cheese as frosting.
Shobelyn Dayrit says
IF using a mixer, 7 minutes! For manual, 15 minutes 🙁
anna says
If I use a Kitchen Aid mixer, how long should I let it mix for and what speed?
If I knead it manually like your recipe how long do I knead it for?
Thanks!
Anaiah says
Oh my goodness! I am so glad I found this recipe. Ensaymada is one of my childhood favorites and it was so easy to make using your recipe. My family loved it and is already asking me to make it again lol!
Amy Nash says
Loved this cheesy, tasty bread! It really was easy to make and so good! Thanks for the helpful tips!
Marie says
What a treat! I was not familiar with Ensaymada before I saw your recipe but now I’m a fan! So soft and cheesy and addictive!
Ramona says
These look so cute and delicious, I am also loving the sweet and salty combination that’s going on here! I can’t wait to give these a go, they look so delicious. Thank you for sharing this recipe!
Loreto and Nicoletta says
We just love this. The play on sweet and salty. The topping. I can only imagine the softness and fluffiness of this sweet bread. You have our curiosity and this is a must try for us! Thanks so much for sharing!❤❤
Leslie says
What a delightful recipe! Even better that it’s no-fail.. that’s exactly what kind of recipe I need these days!
Healing Tomato says
I am so glad I stumbled into your blog because I had never heard of this bread before. Made it yesterday and was completely impressed by it. Will make it over and over again.
Heather says
These are way easier to make than I expected! Thanks for all of the great tips 🙂
Megan Ellam says
Oh, these look really tasty. I will have to give them a go.
Shobelyn Dayrit says
Thank you!!!
Shobelyn Dayrit says
Awesome! Thank you:)
Jade says
I’ve tried many recipes but yours is the best
Your recipe is a keeper!
Merci from the city of lights!
Jade says
I’ve tried many recipes but yours is the best
Your recipe is a keeper.
Greets from the City of Lights
Shobelyn Dayrit says
You can use evaporated milk, or any type of liquid milk.
Kim says
What type of milk do you use
Shobelyn Dayrit says
If you sell it, I say about $15.00.
Isabella Garcia says
Hi, I love your recipe. How much do you think for 12 pcs of this size of ensaymada?
Shobelyn Dayrit says
Hi, Mary.I have not tried it with gluten free flour, so I can’t vouch for it 🙁
Mary Johnston says
Hello, will this work with a good gluten free flour?
Thank you.
Shobelyn Dayrit says
I have not tried it without egg, but without egg, it will just be a big hard mound of though, since egg a leavening and adds structure to your dough.
Ismayl says
Is it possible to make it eggless?
Shobelyn Dayrit says
This will make the dough really fluffy and airy.
Ken says
Hi, i want to know the purpose of the roux , is there any different yeast?
Shobelyn Dayrit says
Thank you so much!! I want to use those cheeses too.
Sjp says
I have tried many recipes and I think this is the best one for me ( as I live alone, I don’t want to get stuck with humongous amount of and not having a lot of freezer space) I used Edam cheese because processed cheese from the Asian store is more expensive than Edam or Gouda.
The result were soft ensaymada. This is a keeper.
Thank you.
Shobelyn Dayrit says
Yes this is a sticky recipe. As you added the butter, knead until you are sure the butter had been incorporated. So, maybe, 4-5 minutes.
leila morales says
Hi i watched the video and read the instruction. It doesnt show or say how ling to knead it. The dough still looks sticky and not elastic. Please advise.
Shobelyn Dayrit says
You’re welcome. Take care.
Rachel says
I love this recipe my boyfriend can’t get enough of it! Thank you so much for an amazing recipe
Shobelyn Dayrit says
This will be a very sticky dough, so just add a little bit of flour for you to be able to work on it. Knead it for about 5 minutes.
leila says
i watched how you knead them. it seems very quick. How long do you have to knead them?
Shobelyn Dayrit says
HI, Mary. I got it when I went home in the Philippines, but I saw some in Bed Bath and Beyond. They are cheap there.
Mary says
Hi! Thank you so much for the recipe. It looks really good & easy to follow.
May I ask where you purchased your tin molds? I looked at Amazon and they seem to be pricey at over $6 each (brioche molds).
Shobelyn Dayrit says
Thank you for letting me know. I hope you will try some of the dishes in the blog and enjoy them as well. God bless!!
Rick says
Great recipe. Easy to make and very tasty. My wife loves them!
Shobelyn Dayrit says
I am so so glad you like it . Thank you.
Leah says
This recipe is awesome. Can’t believe I waited. The buns were super light and fluffy. The other variation that I did was filled it up with Nutella, chocolate chip and chopped walnuts. The lesson that I learned was on the second proofing. I took time filling up the individual buns with different fillings that they had different resting times so a few has better rise than the others. Nevertheless, they were all still good. I’ll probably make another batch and make it like it’s a loaf. It’s a good replacement to the grocery bought white loaf bread.
Shobelyn Dayrit says
I am so glad you like this recipe.Have a great New Year, Hzl.
hzl says
This recipe is great! I thought it was intimidating to make ensaymada but you made it easy for me. It’s really soft, pillowy and a great success!!
Thanks for sharing
Shobelyn Dayrit says
I am glad it was a success!
Anonymous says
It doesnt only take 45 minutes. It takes really long…but then ending went well
Shobelyn Dayrit says
I am so glad that you found it soft and you succeeded on it. Have a Merry Christmas!!
Gg says
This was, at least for me, not easy to make – even though I was able to successfully make this. I fully expected that this would be soft because of the process implemented – making that roux. Thanks!
Shobelyn Dayrit says
This is the standard size.Similar to the standard cupcake pan size in the US.
Jovy says
May I ask the size of your tin mold?
Shobelyn Dayrit says
I am so glad that you get to earn from this recipe. Somebody also used my Siopao recipe and selling it too. Good luck and I wish you the best.
Jane says
I make them regularly now and sell them to friends, they just love it, thanks for this simple but yummy recipe
Shobelyn Dayrit says
I am so glad it worked for you!!! Thank you for rating the recipe, and have a good day.
Aubrey says
Thanks for sharing your recipe. It tasted so delicious.
I made 12 pieces the other day and now I am
making it again
Shobelyn Dayrit says
Thank you forletting me know.Enjoy!!!!:)
Joanna says
Yum! I just made it! Its really really good! So soft, not dense at all! Thank you so much!
Shobelyn Dayrit says
Hi, Patsy.
This will be on the 3rd step. Check out the instruction on the blog. Good luck to you! I hope you enjoy it. 🙂 And, it is softened, room temperature.
Patsy says
Please ignore my first comment- lots of typo- sorry. what I wanted to know is when do you add the butter. I seem to not notice it on the video. Is the butter softened or melted? Thanks
Shobelyn Dayrit says
I am so glad it worked for you.Thank you.
Anonymous says
My first attempt turns out great! Just I think I overproof it since It didn’t rise much while baking. But it was yummy I can’t stop eating
Danielle says
I am discovering more and more of the Filipino cuisine, and it feels amazing. So many great flavors that I love and that I am yet to prepare – like in this recipe. Yum!
Paula Montenegro says
I didn’t know about these ensaymadas. They look amazing! I always heard about the Spanish ones, which are very laborious. I’m definitely giving these a try! Thanks for adding a video too! Very useful.
Jenni LeBaron says
These are super intriguing! I’ve never had an ensaymada before, but I would be more than willing to give them a try, especially with an interesting mix of sugar with cheese. I bet these would be tremendous with a bowl of chili
Aleta says
Yum, this looks very tasty! I like that it is a sweet bread, with cheddar cheese on top, a recipe I definitely need to try! They look like they would be a perfect appetizer for a party!
Tammy says
The sweet and salty combo is fabulous. I’ve seen cheese added in pie crusts so it’s definitely something that is unique to me and would love to try. These little bits sound so good! I’d love to try one 🙂
Leslie says
Well don’t these look cute and tasty! They look super easy to make as well!
Elaine Benoit says
I have never had ensaymada but now I need to. This looks so delicious and fun! Thanks for the step by step instructions, it takes the guesswork out of making these delicious ensaymadas!
Analida Braeger says
This is a very interesting baking technique with the water roux and yeast. When do you add the water roux to the dough mixture?
Amanda says
Wow I never realized how easy it is to make ensaymada. I can’t wait to impress my mother with these!